
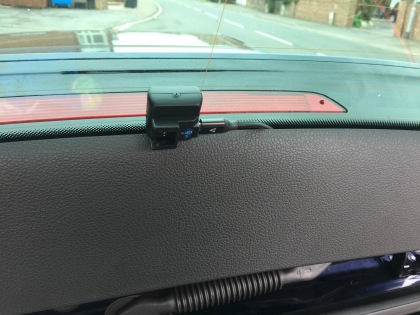
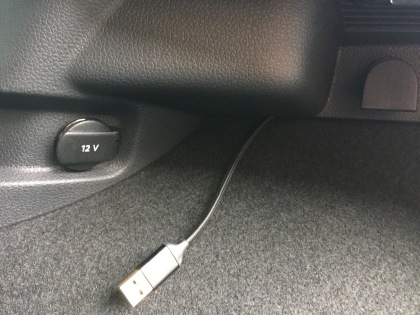
Ever since having someone pull in front of me and stand on the brakes on the M11 in April 2012 (and then take me to court for whiplash), I’ve had a front dash cam. When I got the Golf R, I wanted a rear cam too, so I picked up a Mini 0805. (The front one is a Mio 518.) I also like tidy cabling, so this weekend I ran a USB cable from the camera to the 12V socket behind the trim. I’m just using a regular USB thing in the socket, not any kind of hard-wiring.
I used the DAP Auto Parts rear LED lights install guide for information about removing the trim.
I needed
- Trim tools (like giant tyre levers). Not required, but helped at times. Mine were a hand-me-down, but I believe they’re just an Amazon job.
- Zip ties, both for tidying the cable and for pulling it through tight spaces. If you have a cable snake thing, you’ll want that.
- Electrical tape, for my budget cable snake setup.
- A 3m USB cable (shorter may work but the excess hides easily enough). I used a braided Anker one to match the sort of cables/cable management used by VW.
- My trusty Gerber tool (mostly for snipping excess zip tie)
The result:
How I did it
-
Pull the trim off the inside of the boot hatch. It’s attached by a number of christmas tree clips. I got my fingertips between the trim and the glass, starting at one end and gently pulled it away.
-
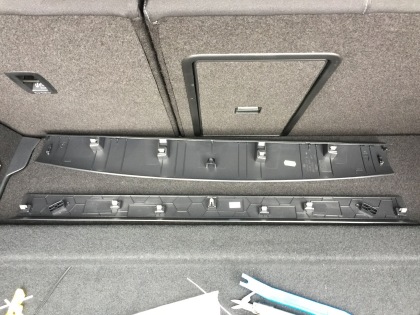
Pull the trim off the inside of the hatch on the car. The attachment is the same arrangement as the first piece, and I did similar to remove it, except putting my fingertips under the trip behind the rubber seal to get at it. This is the insides of the two pieces so you can see where the clips are to pull against:
-
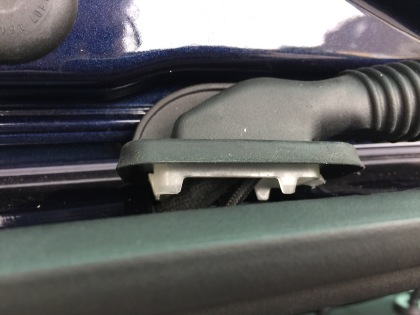
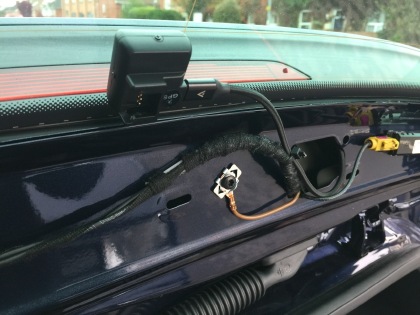
Pop the ends of the rubber tube off the hatch and car. These have a solid tab one end, and a push-tab the other. You can’t just pull them out - you need to push the tab. On the car this is easy as you can just see it; on the door it’s a bit harder. I did it with a combination of pushing with my fingers through a hole in the metalwork, and a plastic trim tool. The push-tab on the hatch door is towards the offside of the car. Pic for reference, showing the car-body end:
-
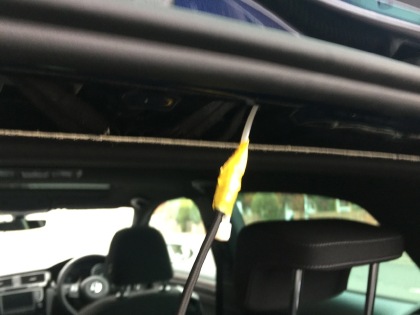
Feed your cable through. On my car it was quite a tight fit at each end, and I couldn’t just push the cable through. Instead, I got a long zip tie and pushed that through (“lump” end first), then taped the connector on the cable to it and gently pulled it back through. (Apologies for this one being blurry; I’m not going back to the car to redo the process for a better photo ;) )
-
Zip tie the cable in place and clip the ends of the rubber tube back in. Run the cable across to the top of the C-pillar trim and start tucking it behind by pulling the rubber seal away. I found a trim tool useful here.
-
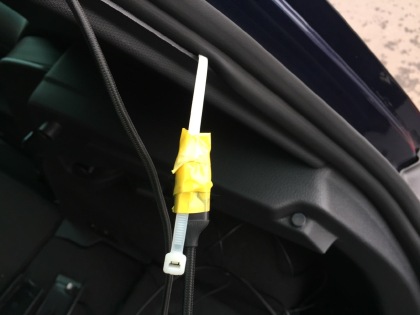
At this point I realised it would be neater if I could get the cable to just appear by the socket instead of having to wrap it round the trim once I reached the right level, so I joined two zip ties together to make them long enough, and pushed them up behind the hard plastic trim with the boot light in, up into the void behind the C pillar trim. After several attempts I got the end of the zip tie in each to pull through, and taped the other end of the cable to it, and pulled the end through. The excess cable remains in the C pillar void.
-
Put all the trim back on; I found it easiest to just line one end up and pop that clip in, then do the other, and then just push along the rest knowing the remaining clips would all be lined up with the holes correctly. After that, make sure none of the rubber seal is trapped under the trim (and same down the C pillar trim edge).
-
Go for a drive to make sure the camera’s working ;)